
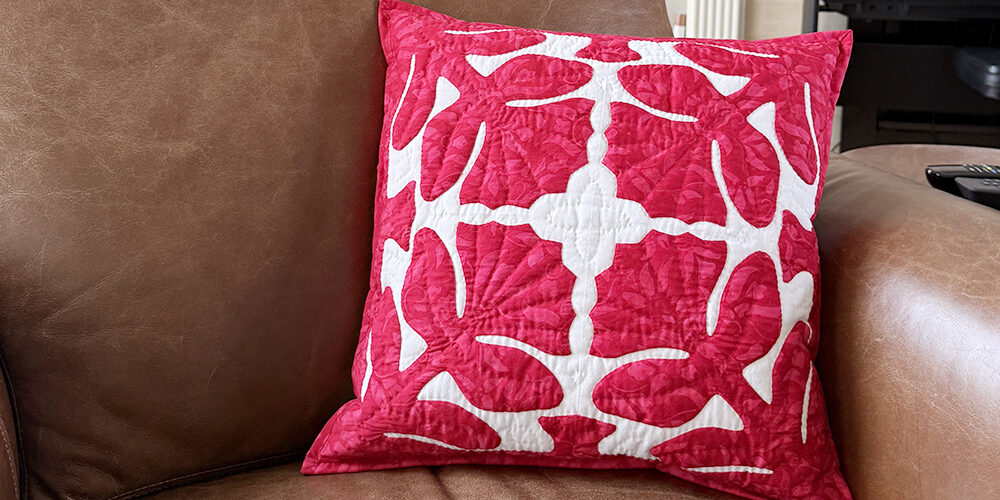
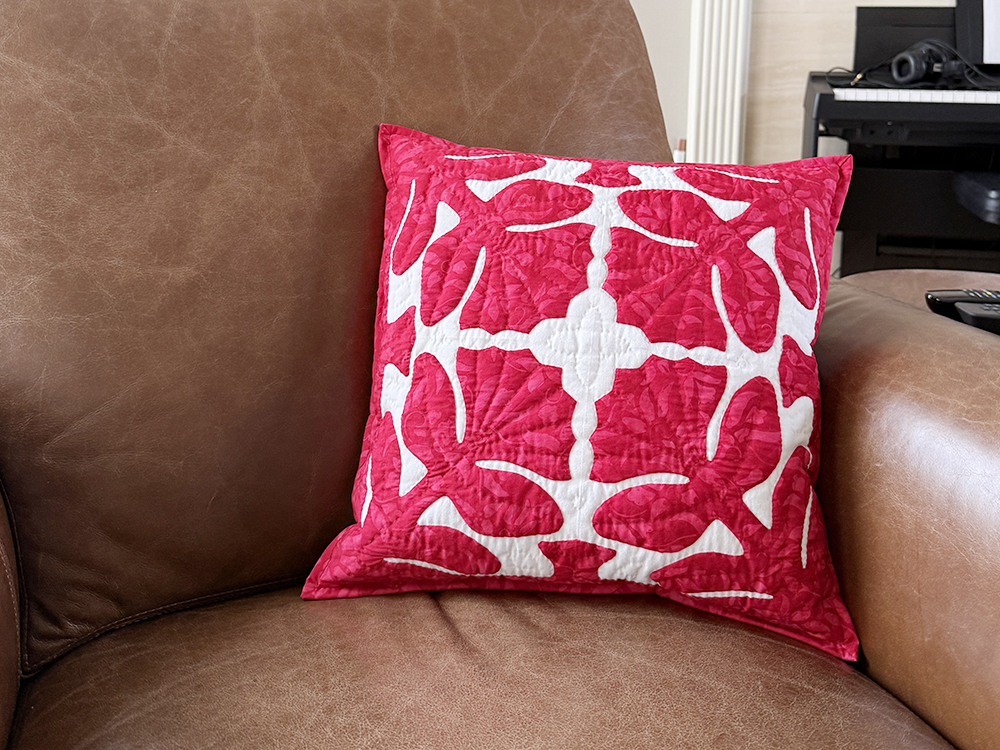
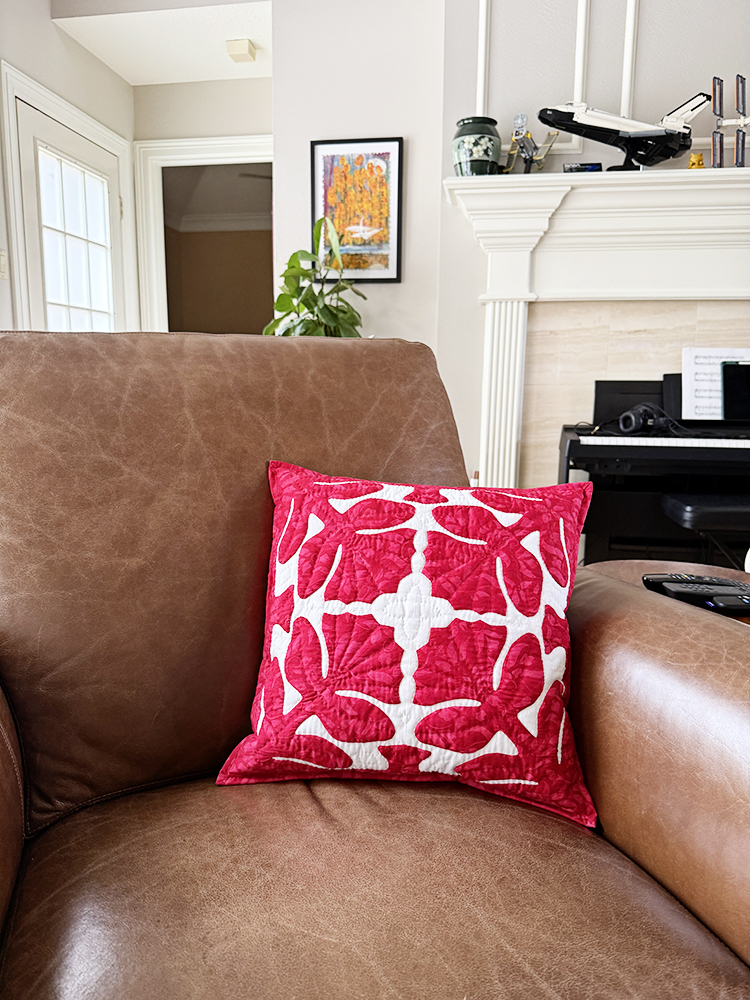
Last week I finished my first — but maybe not last? — Hawaiian quilt project! I picked up this pillow kit from Kilauea Kreations in Hilo when we were there in mid-March, and have been slowly working on it since then.
Last time I shared this project, I had just finished the stitch-in-the-ditch phase of quilting. After that I created some small echo shapes on the open sections of white fabric, and then quilted each of the flowers and leaves. The typical quilting method for Hawaiian quilts is to use a hoop. I’ve never done that before and was interested in trying it out, so I did — and quickly got frustrated! I think (know?) that I would improve with practice, but after a few fits and starts, I decided to ditch the hoop and just revert to how I’ve hand quilted in the past.
That said, one other thing I tried for the first time was used a “betweens” needle for the quilting. In the past, all of my hand quilting has been “big stitch” style using a fairly long needle. For this pillow, I did want to use the shorter stitches that are more common in Hawaiian applique, and my longer needle was making it harder than it needed to be. The betweens needles (I got size 10) are shorter, and don’t flex quite as much. I really loved these needles! I’m sure I will reach for them again in the future.
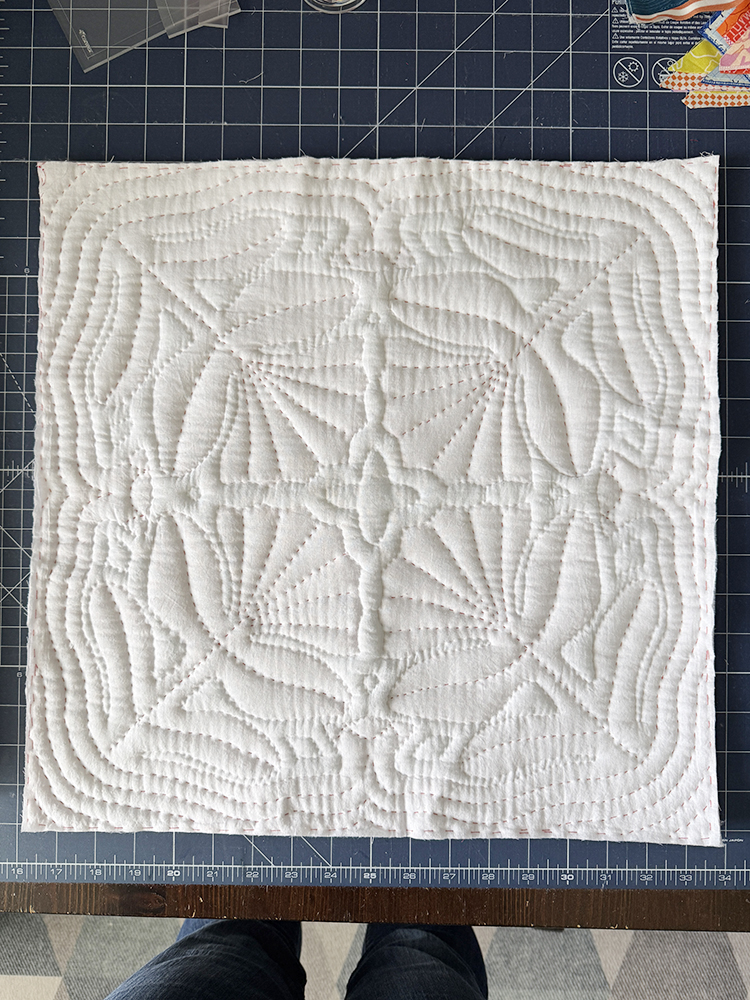
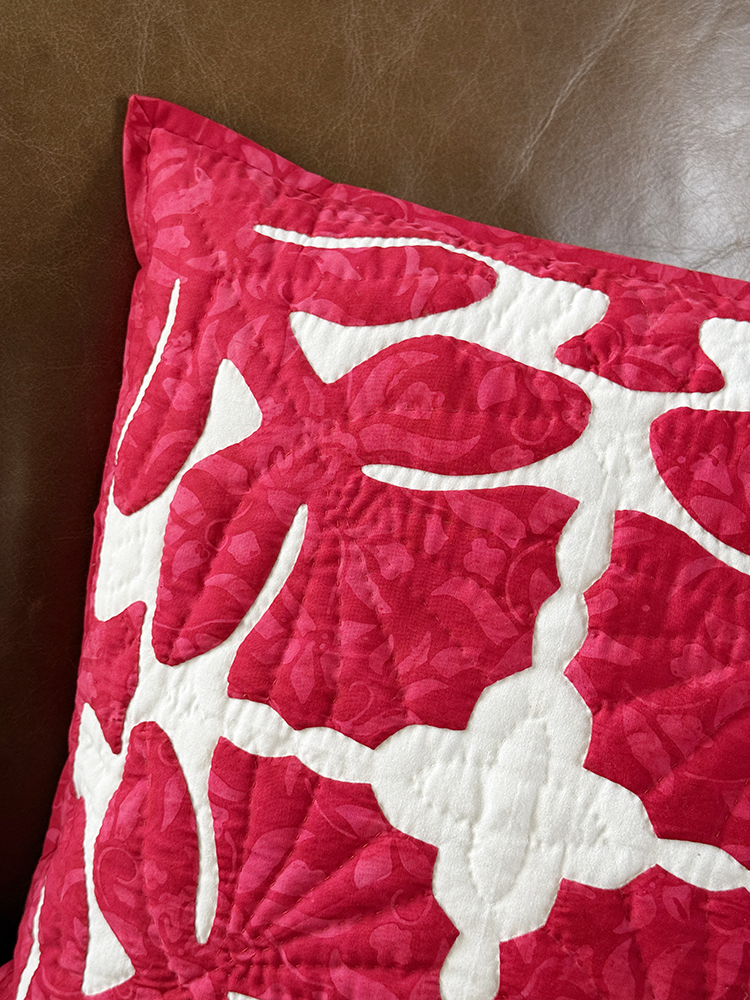
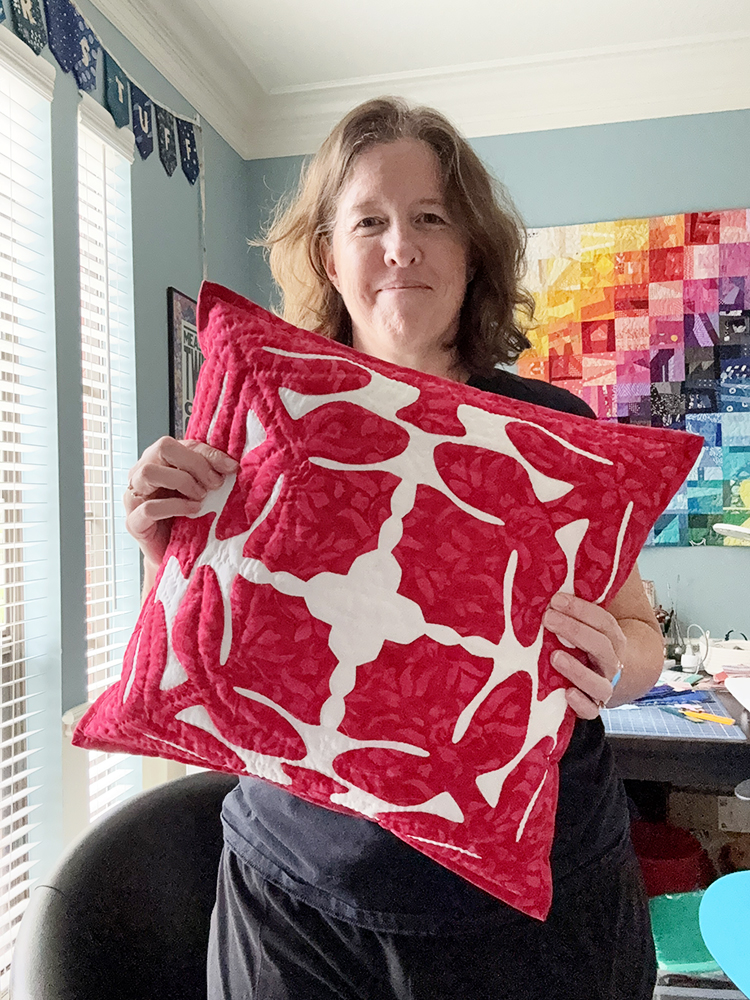
The kit came with a very thick and puffy polyester batting. The thickness was a little tricky to manage first, but after a bit of practice it got easier and my stitches improved. Using the high loft batting definitely made the quilting stitches stand out, and I absolutely love the texture of the finished pillow. You can really see the motif well on the back — literally the only negative part of this project is that all the lovely texture on the back is now hidden inside the pillowcase!
This was a very fun project from start to finish, and has left me wanting to do another applique project sometime soon — we’ll see about that. In the meantime, I will enjoy seeing the pillow in my living room!

It’s beautiful! Enjoy following your blog!
Cheryl
I’m so glad you snapped a photograph of the quilting texture before finishing it into a pillow. Looks wonderful!